


Gender reveals are the new trend, and I have to say that they are one of my FAVORITES. I mean, can we just do some #realtalk for a minute? That first trimester of pregnancy is the worst. You're sick, exhausted, and already want to be done with the entire endeavor (seriously 24/7 nausea until about week 19. I know other women have it worse, but I am DONE). That 20 week mark is like a sliver of light you can keep looking to; because, not only is it when you will find out the gender of this little babe inside of you, it's also when you are halfway done! * happy dance* So, why not celebrate?!
For the gender reveal with our first we were pretty straightforward - cake and a box of balloons so that we each got to do one (I won, by the way). This time I wanted to do something where everyone could participate in the excitement. At first, I wanted confetti cannons...but quickly realized doing those inside due to the Utah winters would not be an option. So, I opted for something close: balloons filled with confetti! I know, I know - it's also been done a million times. So, how was I going to make this one a little more...special?
First off, I started looking for party themes. If we were going to do something where everyone was involved then we may as well do a whole party! After a quick perusal of Pinterest I came across this image:

Oh the whimsy!!
I LOVED the idea of this theme. But...how to do it with balloons? Then it hit me like a ton of bricks: the balloons are black like a night sky, so why not add a few stars and Voila! Twinkle, twinkle little star theme. Done.First on the list: Get the Balloons
We ended up opting for 30 regular black balloons filled with a mix of what our local party store called "shred." There are two types: crinkle paper shred and metallic streamers shred. We did a mix of both so that it would show up better in pictures. The party store was happy to oblige in looking at the sonogram and taking it down to fill our balloons on the day of the party so that we wouldn't know, either!Second: Stars Galore
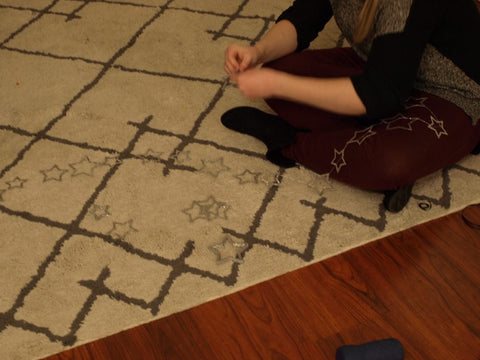
I am the proud owner of Cricut so this part was fairly easy. I made a quick (or not so quick) trip to Hobby Lobby to get some glitter paper. This stuff was AMAZING. When I got back home I picked a star shape & started cutting away! We used these as well as an "Oh Baby!" sign for not only the balloons but for cupcake toppers as well!

For the cupcake toppers I got a few sticks and a hot glue gun to glue away! I measured the sticks first by setting them in a cupcake pan and guessing on the height that I would want them to be. I then cut them down to size and on the raw end glued the star or "Oh baby."


Third: Cast Your Votes!
I adore that at gender reveals everyone can cast their votes and see who was right after the big reveal! So, we pulled out our Jaq Jaq Bird Chalk Table Runner (available for special order at The Baby Cubby) and had a friend hand letter the theme onto it. The Jaq Jaq Bird Butter Chalk makes hand lettering and anything like this so easy btw. It does not get dust everywhere and you can fill in thicker parts really easily! The night of the party we hung the banner on the wall and outlined it with a Meri Meri Star Banner (also available for special order and a GIANT thank you to my friend Alexa who came and helped us put it all together!) We left blue and pink chalk out for everyone to write their guesses in their chosen color!
Fourth: Balloon Set Up
Luckily my ceilings are pretty low, so with the added length of the balloons everyone would be able to reach them taped to the ceiling (for our starry night sky!). We took some regular ol' tape and added two pieces to the tail of the ballon. I did five rows of six balloons each and kind of offset each row. It was PERFECT.
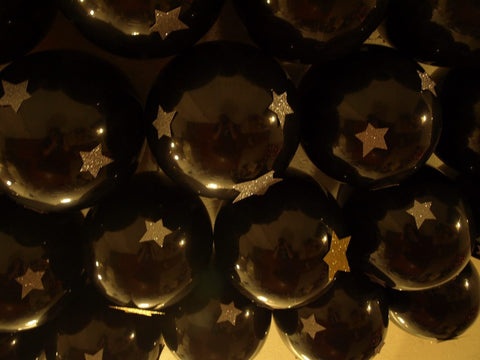
Next, we added what felt like was a MILLION stars. I had cut these out of a mix of silver and gold glitter paper to give a little variety. Again with some regular tape, we stuck them on the balloons! Our starry night was complete!
Finally: Time to Party!
Now, all that was left to do was PARTY! The night of the reveal we had everyone bring an item for the dinner and we provided the fun cupcakes!

We couldn't wait TOO long for the reveal though, and neither could our two year old, so we got the show on the road after everyone had eaten their fill. We couldn't have been happier with the results!
Overall I felt like this party was a pretty easy one to pull off. It could have been a little easier even if we had bought the stars pre-done instead of doing them ourselves. But, we wanted to save a little money over a little time, which is why we went ahead and made them ourselves.
2 comments
so when my daughter found out the gender of her baby of course i had to help her plan cause she was just 11 so we foudn out the gender and likea month later we had the reveal so we had blue smoke cannons so first we had blue and pink cup cakes then we had everyone sign a sheet of paper with there name and like if there aunt or uncle or grandma stuff like and if they thought that the baby would be a boy or a girl so we also had cake we ate at the end so we did activitys so she loved it and we got so many gifts
[…] and tubes. This is a great idea for a gender reveal party or something snazzy like New Year’s Eve. Make some confetti poppers or tubes/straws for […]